Showing posts with label D&D 5e. Show all posts

Monday, 13 February 2017

Realm Works - Working With Random Tables

In this video I show how I setup random tables within Realm Works taking advantage of the auto-linking functionality.


Building further on the need for random tables I looked into some 3rd party options to auto generate random table results. I was very happy with the results. In the video below i use Inspiration Pad Pro 3.0 to automatically display results. 


Many people prefer to use the Donjon website to return random table results. Well I did some testing and Realm Works can be configured to display random table results from a single click!


Realm Works - Using Storyboards

In this video I show how to use Storyboards to create flow charts within Realm Works. This lets you map your stories out in a way that's efficient to use at the table.


Realm Works - Integration With Spotify

In this video I show how to create URL links within Realm Works that can be used to trigger play-lists and songs within Spotify.


Sunday, 4 December 2016

Hirst Arts - Started a modular village!


For a long time now I have being fighting an internal war.. I have alot of terrain, it's all modular and I can make alot of different environments out of it. It's also very functional. My buildings are all open top so that my players can interact inside. But ultimately, when I made a village, it didn't look like a village. It didn't have the right atmosphere.

This is what is looks like when I setup a village scene using my current design.


So while this didn't give the town look and feel it allowed for great game play. Buildings were represented, my players could interact with them. Deep down though I knew it was only a matter of time before work began on a real village. Something you would look at and go wow.

So I bought the following molds:

Half Timber Mold #225 - $29.00
Wood Shingle Roof Mold #240 - $29.00
Stucco Panel Mold #251 - $29.00

And work began. 

Now my terrain largely works on a 5x5 grid. So ultimately I wanted to ensure the buildings adhered to the same system. The smallest building would be on a 5x5 base and increment in units of 5 from there (10x5, 10x10, etc).

Following along with the tutorial provided over at the Hirst Arts website. '

The walls were made from the Stucco panel mold and glued to the back of some cereal box. The panels were undercoated with cream and then dry  brushed with white to bring out the detail.

I played around different layouts using the wood from the Half-Timber mold. 
 <Insert Pic Here>
I purchased some double-sided tape and used that to stick all the wood pieces to so that I could efficiently paint it. They were spray painted black and then dry brushed brown.

The timber was glued to the stucco panels. The sections that over-lapped the edge were snapped off.
More panels with wood work added. 
I made a base from 5x5 grids using the 'Floor Tiles Various Sizes Mold #201'. From there the wall sections we're glued into place. 
Front view with the walls up.

The roof was added.

And finally, the 'nearly' finished product now slots perfectly in alongside my other 5x5 tiles. Now I just need to make alot more buildings to create a full village!


Thursday, 1 December 2016

Magic Set Editor - Create Custom Card Handouts For You Players

In this video I give a quick run through Magic Set Editor. This is an awesome FREE piece of software that allows you to quickly create cards that can be used as hand-outs at your table. 

Monday, 14 November 2016

Realm Works - Where Do I Begin?

So one of the challenges with Realm Works is it's a massive piece of blank paper.

Starting out can be overwhelming and the question is often asked, where do i begin?


Saturday, 12 November 2016

Realm Works - Working With Tags and Creating Custom Categories

Here I had a play with using Tags within Realm Works to see what sort of functionality I could obtain by placing tags on specific content.

I played largely with Monsters, adding a tag for the creature type. I like the way this gives me the ability to easily filter on all 'Beasts' or all 'Fey' creatures.

I then go on to show how I added the custom tag to all of my monster categories and from there showed how to create a completely new custom category.


Realm Works - Forgotten Realm (Faerun) Interactive Map

I've been slowly chipping away at this project for a number of week now. But I finally completed entering all of the location date from the Storm King's Thunder into Realm Works as an interactive map.

Now I can click all over the realm to find out more information about the area!

This is achieved using the Smart Image functionality within Realm Works.


Sunday, 6 November 2016

Hero Lab - Player Character Creation Software - A Player Tour for D&D5e

Many would argue that you don't need software to assist with the creation of Player Characters (PCs) in D&D 5e. And they are correct, you don't... I do however want software to assist the the creation of PC's.

I spend quite a bit of time playing with brand new people. My ground and I have only been playing for around two years. We are surrounded by people who love board games but have never played a table-top RPG. These are the type of people that want to come to the table and try it, but don't necessarily want to read the Player Hand Book prior to trying it for the first time.

This is where Hero Lab shines in my opinion. I can sit a player in front of my PC for a few minutes and quickly whip them up a character in a method that feels familiar to the new player as it follows a similar process to many RPG video games.

Then I simply print the sheet out for them and it comes with all the descriptions for spells and abilities. I can't stress how much simpler this is for introducing new people to the game.

It's not just handy to new players though. My experienced players love using it as it reduces the down-time at the table usually involved with people having to stop and look up rules from within the books.

Check it out below.


If you decide to pick up Hero Lab for 5e be sure to get the D&D 5e Community Pack.

Tuesday, 1 November 2016

Realm Works - Playing Sounds at the Table

So playing sound at the table is something I have been looking at doing. The room is ready with speaker in place so I am physically able to do it.

What's missing for me is an efficient way to manage the database of music and sounds and an efficient way to play those sounds at the table.

Now given I already have Realm Works, Hero Lab and MapTools running when I DM, I would ideally like to avoid having yet another stand-alone app to micro manage. With that in mind I played around today with different methods to include sounds and music within Realm Works and played around with triggering those sounds from my module content.

I'm still not happy though, and I would really like to hear people's thoughts and ideas on a better way to play and manage sound at the table.


Software to Create RPG Maps

Lately I have been seeing the same question getting asked close to 3 times a day...

"What software can I use to create maps for my RPG?"

It's a good question and one that has alot of different answers.

First I would suggest you get familiar with The Cartographers' Guild. This is a great resource for cartographers. Specifically, they have an entire sub-forum to discuss the various software that can be used to create maps.

Having spent some time there I decided to purchase Campaign Cartographer 3+.

Pro Fantasy create CC3+ and state on their web-site that they have led the field in map-making software for gamers for 20 years! It's a big call to make but lets you know instantly that this is not a new piece of software coming onto the market. This is established, with a fan base and community to support it. This is something I always look for with my RPG software as alot of software rarely makes it to the official launch phase.

This is particularly important for CC3+ as there are a HUGE amount of assets made available  by the community. You just need to download them are start using them to create amazing maps! Check out the CSUAC and Dundjinni Archives if you plan on using CC3+!

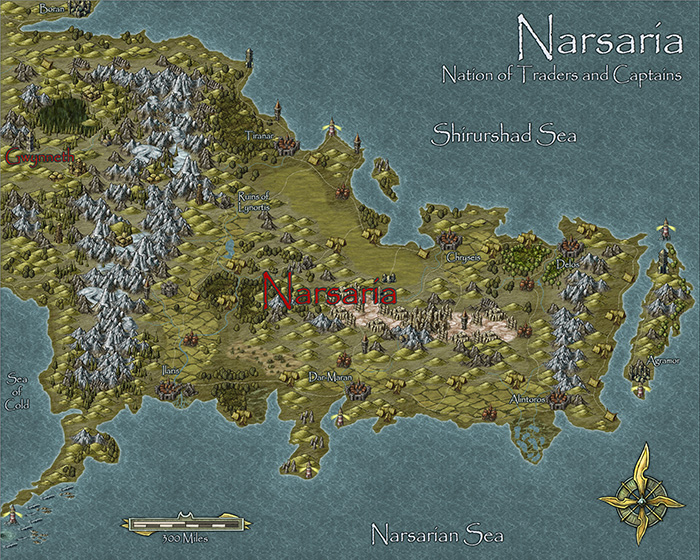
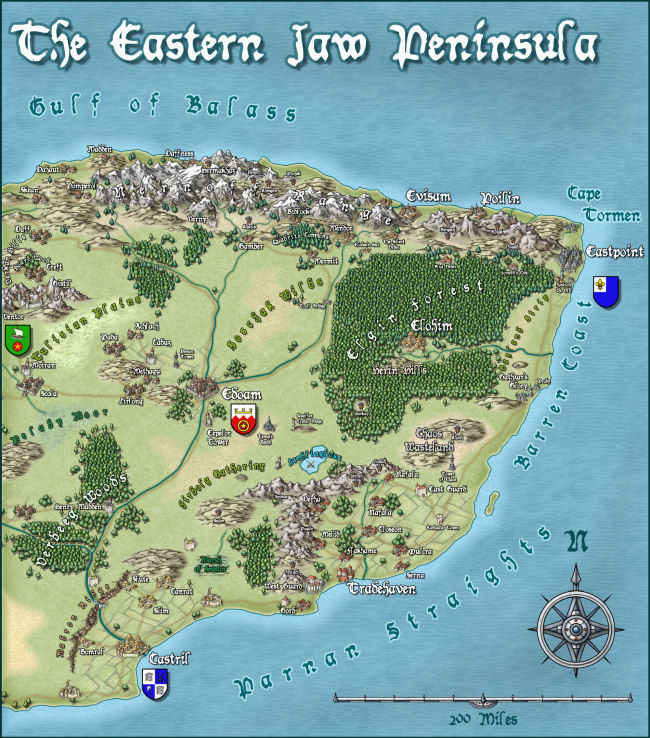
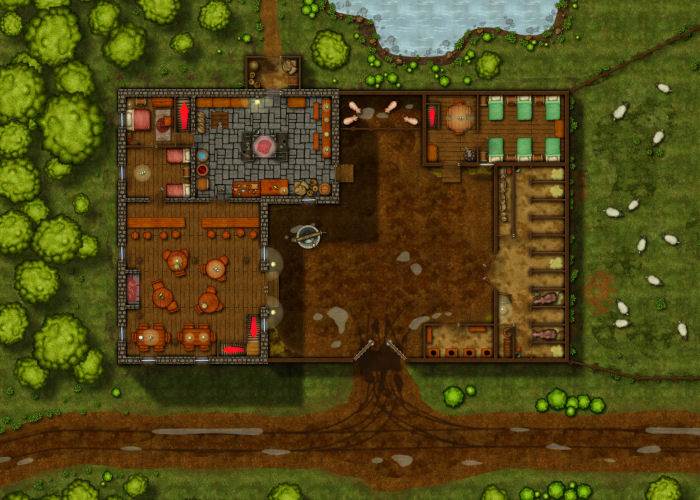
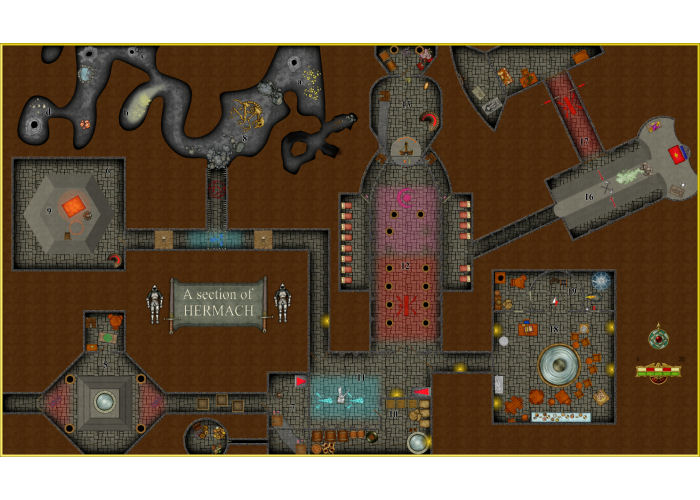
Check out the video below to see the software in use. I've only been using it for a few weeks, so I have included some amazing maps below made by experienced users so you see can the real potential of this software.


Campaign Cartographer 3+ is designed to make overland maps. 

Dungeon Designer 3 is an add-on to assist in the creation of Dungeons and Floor-plans.

City Designer 3 is an add-on to assist in the creation of cities and towns. 

I don't own it yet but I'm keen as mustard to try out the Perspectives 3 add-on so I can make some isometric maps!


There's also quite a few more add-ons so be sure to check out the Pro Fantasy Website!


Friday, 28 October 2016

What is this Hirst Arts?


So one of the constant thing's I see on social media circles is people posting photos of Hirst Art terrain that they have made. The response is always fantastic and there's always a handful of people who reply stating they wish they could afford or were artistic enough to create such terrain.

First off, if you are one of those people get on over and join DM Scotty's Craft N' Games. It's a Facebook group dedicated to creating terrain and RPG material. It's focus is on making things from cheap household items and the stuff you see posted daily is incredible.

However, just from reading my blog you should know that I work mainly with Hirst Arts. Bruce Hirst is the artist responsible for Hirst Arts. He creates silicon molds that you pour plaster or resin into. The output is effectively LEGO blocks designed specifically for creating terrain. And the results speak for themselves.


Photo from HirstArts.com showing the potential with the cavern system molds.

Photo from HirstArts.com show the potential with the Gothic setting molds.

Photo from HirstArts.com showing the potential with the Inn Builder molds.

Now most people look at these photos and immediately fall in love but at the same time start cringing at the thought of the cost involved. And I'm not going to lie, to create everything you see above would cost quite a bit due to the number of molds you would need to buy.

BUT... What is you could start creating terrain for approximately $100? 

Because that's all it really takes to get started. For about $100 you could create terrain similar to what you see below. The best part is, you can make as much terrain as you like, because once you have the molds, you only need to buy more plaster to go into the molds and then you can just keep creating.

Photo from HirstArts.com showing a basic dungeon setup.
To create the pieces above all you need is two molds. You can get them for $63 (postage not inc) from the Hirst Arts Store. The molds required to build a dungeon that looks like this are:

Gothic Dungeon Builder #45
Floor Tiles Various Sizes Mold #201

You will also need something to pour into the molds. Don't bother with Plaster of Paris. It will chip. You want to look for something like Hydrastone or Merlin's Magic. I personally use Hydrostone which I can pick up 22.6KG for $49.50. This make's a metric shit tonne of dungeon!

You're going to need a few other things. But you probably have some of the stuff lying around at home. For details on how to cast check out these instructions.

With your molds and plaster in hand it's as difficult as following the instructions provided, the result will be an amazing Gothic themed dungeon!

There's really not a whole lot to it. You can create professional looking dungeons that are comparable to the mighty Dwarven Forge but for the price of one of their sets you can instead own the molds and create a much larger quantity of dungeon pieces.

Obviously only having two molds is going to limit you to creating specific looks. But this is just a starting point. You can simply buy new molds to create new looks and completely different terrain!

I've had so much fun working with Hirst molds. I seriously recommend checking it out for anyone wanting to bring some 3d terrain to their table!

Hirst Art molds with plaster poured.
Some pieces straight out of the molds.
My first floor and mold pieces, Playing around with different configurations.
Some painted pieces.
My first dungeon pieces made mainly with the molds listed above.
My first dungeon pieces painted. 
How large you build is up to you.


Friday, 21 October 2016

Realm Works - Creating Worlds

I run through a tour of how I setup the D&D world within Realm Works. Starting with the Planes of Existence and zooming all the way in to a planet, body of land, location and even the NPC living in that location within the world.


Sunday, 16 October 2016

Upgrading the Projector Setup

I finally got sick of the huge mirror cutting my game room in half. It worked well to bounce the projector image onto the table, it certainly made a large output, but it made the room feel cramped.

Here's what the old mirror looked like. It was ugly and made the room feel cramped!


The projector was mounted to the roof, aimed at the huge mirror which beamed the image onto the table. It created a massive image which spanned 2x trestle tables which was great but ultimately the picture was weak and the keystone correction was completely off.


So i set about trying to replace the huge mirror with something more suitable that would be mounted to the roof.

I went down to our local scrap-yard and scored a huge win. A huge piece of First Surface Mirror just sitting there begging to be brought home. It was a full body length piece! I couldn't believe my luck when the lady at the front only charged me $7 for the whole thing!

I purchased a glass cutter to get it to a better size and mounted it to some wood with liquid nails. Added a hinge and mounted into to the roof.

The result have been a significant improvement. The image in clearer and brighter. The image beams straight down to there is very little shadowing beneath the models now and the keystone correction is now perfect.

Testing the positioning for the mirror. 

Mirror installed, playing around with the angle.

Happy with the position and angle and gave the mirror a clean.
The town of Red Larch beaming to the table. 

Temple of the Crushing Wave with Fog of War. 

I had to remove the original lights to make room to mount the mirror. I went with this spider like light system allowing me to install a light behind each side of the table. Also in the process of getting a dimmer switch installed to allow greater visibility of the table while still enabling light. 


A shot of my game room in all it's messy glory. You can see the table projection working and the extra monitor above my DM station. I use this to display monsters, npcs and handouts from Realm Works to my players. 

A closer shot of the setup as the players see it.
The view from my DM station. 

Overall both myself and my players are much happier with this setup. Well worth the investment.


Friday, 14 October 2016

Realm Works - Prepping a Module

This video is probably a bit long winded for most but I took a crack at showing the process of entering a PDF into Realm Works. It might be of interest to some.


Realm Works - Working with Timelines

Today i uploaded a video showing some of the functionality within Realm Works used to track timelines. Check it out.


Wednesday, 5 October 2016

Realm Works and Hero Lab - Working With Monsters

Today I show some ways you can work with Hero Lab monster portfolio's within Realm Works. Use the power of Hero Lab to quickly and very easily make variant monsters to challenge your player's with.


Next you can see how easy it is to create custom monsters and make them forever available as an option from within Realm Works. Using this method you can easily play with 3rd party content.


Tuesday, 4 October 2016

Realm Works and Hero Labs - A GM/DM Tour

Today I present a tour of Realm Works and Hero Labs for any interested Dungeon Masters out there.

This is a really powerful suite of software that goes a long way to assisting DM's with the sometimes overwhelming yet rewarding task. 

Check out the video below and leave any thoughts in the comments. 


Thursday, 26 May 2016

Adding A Projector To The Table

I recently moved from playing a homebrew campaign over to planning Prices of the Apocalypse. This presented a real challenge for me. The module contains numerous very large dungeons. Many of which have very unique designs that I wouldn't be able to replicate with my current module dungeon setup. I could of course build each dungeon. But the number of dungeons required and time the players are expected to spend in each dungeon means our game would take years.

I therefore started investigating alternatives for getting the digital maps represented on the table.

Obviously printing was my first thought. It's a viable solution and something that I have done previously. Simply print the map off and play on that. But ink gets expensive and printing a new map every session gets tiresome. Storage of those maps becomes a pain.

So I started looking into a VTT solution.

I've seen some great projects online where people have built tables and built TV's into them. I really wanted a BIG solution though and big TVs are expensive.

So I started looking at projectors. I picked up a second hand one from an office sale and have managed to get a "workable" solution. I'm far from happy yet but it is playable.


I tried aiming the projector directly onto the table and using keystone correction to correct the image. That didn't work and I wasn't happy with the size of the image on the table. The distance from the projector to the table was simply too short for the throw distance of the projector.


As such I stole a mirror from the missus and developed the overly dangerous configuration you see above. This resulted in a much more acceptable output. With this I have displayed some usable images to the tables.


The outstanding problem is the shadows thrown by models on the tables. I really need to find a way to direct the image from above the table instead of the side. We have plans to try out the head of an overhead projector to see if that can increase the size of the image while also directing the output from directly above the table.

Here's some more examples of the current output. The possibilities are exciting.


Eventually I plan on using Realm Works to control the pictures which will give me the ability to restrict Line of Sight for specific parts of the map.


Friday, 29 April 2016

Realm Works, Hero Labs and why i no longer use books at the table.

So my physical crafting has slowed down immensely since the completion of the Tomb of Horrors. There's a few reasons why but largely i really don't have a need for more terrain right now. I DM for two groups. One has just left the ToH while the other still has one more session left.

However, my primary group really threw me into an area I am inexperienced as a DM. The open world... They wished themselves back up to the surface which effectively stopped my ability to rail-road them into a story line as they progress through the Underdark.

I started researching options. The concept of released modules was very appealing due to the reduction in necessary prep time. The problem however is I'm a very process driven individual, i like order in my information so the concept of using modules has always been irritating as I was always flicking through the books trying to find relevant information. I found the books broke the immersion for me and our group. So I started researching more advanced ways to manage the stories and modules.

A few things happened around this time which have completely changed the way I both prep and run games. And the changes have certainly been for the better.

A) Hero Labs released the monsters for the 5e SRD pack.
B) I brushed off my copy of Realm Works to test the functionality between HLs and RWs.

Hero Labs is a simple concept that most players would recognize. It's a character generator that lets you build all sorts of fun and funky characters. Enter it in the app, print it off or run it on a laptop / Apple IPad.

As a DM I honestly only purchased Hero Labs because I wanted a way to let new players create characters that interested them quickly and efficiently with minimum reading. You simply can't hand the PHB to a non-gamer and expect them to keep up. I wanted to use Hero Labs to avoid that learning curve and get them straight to the table; and it certainly worked.

But as a DM I thought that's all I was doing. I really didn't understand what Hero Labs could do for me beyond that. I could see options for the Encounter Builder and Tactical Console in the menu but the 5e SRD release from Lone Wolf didn't have monster's loaded at that time so these didn't really do anything for me.

Then Lone Wolf release the monster update and I began to get excited. Opening the Encounter Builder I was presented with a screen that allowed me to quickly pick monsters to add to the encounter.

Note: The Hero Labs 5e Community Pack has added all of the monsters missing from the initial SRD release. Check it out HERE.


Of course I then ran straight to the Tactical Console to test out that functionality. I was presented with a page that displayed almost everything I could want in a combat. It rolls and then tracks initiative. I can apply damage to heroes and monsters. I can heal heroes and monsters. I can mouse over anyone to see what stats / abilities they have.


At this stage I was over the moon. I had all the monsters from the PHB at my disposal to throw quickly and efficiently at my players and I no longer needed a spreadsheet to track damage against the monsters.


I did however find myself getting tired of having to enter monsters into Hero Labs Editor every time I wanted to do something that was different from the stat block that comes with the MM. That concern however was completely blown away when Lone Wolf released the latest patch for the 5e SRD giving us access to a Custom Monster feature within Hero Labs! Now we can create custom monsters and npcs in the time it takes to cut and paste the details across!


I was very happy with Hero Labs at this stage. It was already changing the way I managed combat at the table. It was enabling me to react quicker to the players. If they wanted to know how a spell or special ability worked, i could simply hover over the entry and read the text. I found myself getting more descriptive. Instead of saying you cast X spell. I can however over the spell, see what component it requires and how it should be cast and build that into the description.


Hero Labs isn't the first Lone Wolf software I purchased however. About a year ago I purchased a copy of Realm Works to help manage my campaigns. Realm Works is a campaign management tool. It's where you keep track of npcs, towns, stories, etc.

I tried to use it for a bit, but honestly I did not understand just how useful and amazing that tool was. I can honestly say I think I was overwhelmed. There were so many things with the tool that you could do; and I wanted to enter it all. I found myself entering data for completely unnecessary items. Building every npc in an inn because i could and then looking at the clock and realizing I had run out of time to organize the actual encounter that my player's we're turning up to run.

So I stopped using Realm Works and moved to One Note for the best bit of a year.

I am so glad that I decided to return to Realm Works!

The first time I used it I started by adding in the places, npcs and storyline elements into the tool. Because of this I really didn't see the value as I was just taking notes.

If you are looking at Realm Works you need to stop and enter your core books!

1. Enter the PHB
2. Enter the MM
3. Enter the DMG

The reason for this is simple. Realm Works most powerful feature is 'auto-linking'. If you write a note that contains the name of another piece of content within the tool it will automatically create a link to that content when you save the note.

This is why you need to enter the core books first. You create the PHB with a spell content called 'Spell of Plants'. Now every-time you write 'Spell of Plants' in a snippet within the tool a link is generated allowing you to follow the link through to the entry about the spell.

Here you can see the Speak with Plants entry.


Here I typed the name of the spell in a note. When saved it automatically created a link to the spell.


Now this become's immensely useful because i now have links to all the relevant rules from directly within my notes. This is saving me a huge amount of time as i no longer need to look up the option in the rule books.

Of course this functionality works on module content too! The trick with modules is to start with the back. Enter everything from the appendixes. Then enter just the names from the rest of the module. With the names of all the entries entered you can start copying / entering the actual text from all the entries in. Every time you save a link will be created to everything it recognizes.

Here you can see an entry from Princes of the Apocalypse. It's picked up links to numerous articles.


Note the colors here. You can mark snippets as Read Aloud passages or a variety of other alternatives. This colors the snippet of text enabling you to identify it much quicker at the table!

By now you should start to see there are benefits to putting your books aside and reading the module on a laptop. Jumping around within the text to the relevant information becomes simple and efficient.

Of course however there is more!

When entering the monsters into Realm Works there is an option to use a Hero Labs Portfolio. This enables you to build the monster / npc in Hero Labs and link it directly into Realm Works. From there you can view the stat block within the tool.


There is a much better function though. There's a button to load the monster directly into your open Hero Labs portfolio! This means you can start the game with your Heroes loaded and as you read through the module and encounter monsters, you just click the link from within the monster, set how many of those monsters are in the combat and BOOM. Your encounter manager now has a list of everyone involved in the combat. Rolls initiative and your straight into the fight!


As I said above... i love process which means I love flowcharts that neatly present the flow of information. This is where the Realm Works Sotryboard option becomes useful. You can create the flow charts from directly within the tool! However it's better than that, you can link other aticles to the Plot Points. With the story board built you can now split your screen to see the flowchart on the left and the linked articles on the right. If the case of pre-written modules this lets you quickly and efficiently move from article to article while also allowing you to weave the web of relationships.


You may have noticed the green and blue circles on the articles. This is the 'visible to player' indicator. It is possible for player's to purchase their own player version of Realm Works enabling them to access content that you have marked as visible to them. I personally don't have player's using this feature but i imagine it could be quite useful in large campaigns.

What i am using is the player view option that is controlled via the DM. This opens a window on a second screen that is intended to be run on a second monitor and displayed to the party. A quick and shonky upgrade to my room means I now have a monitor hanging above the table facing the players.

You can click on the articles within Realm Works and send it to the player screen meaning I can display maps, pictures of monsters, pictures of npcs, player handouts, etc live to the players.

The worst part about Realm Works is having to manually enter all the data in. However that appears to be a short term problem as Lone Wolf are preparing to launch a content market for the tool. This will enable you to purchase modules for the tool that are pre-populated. Imagine being able to buy the core books and the latest module on here in stead of the physical book and having everything linked and easy to find. Yes please!

Overall I have been incredibly impressed with both tools. Yes I have had to evolve the way i play from books into a digital standard but the benefits are huge. I'm sure there are people out there that will never want to use a laptop to run a game. But for the rest of us, this is a significant improvement and a great option.

I highly suggest you check it out!

And if Lone Wolf ever read this... Here's my wish list for future improvements :)

  • Android App for Hero Labs!
  • Syncing between Hero Labs DM and Hero Labs players at the table with cloud management for the data!