Saturday 16 January 2016

Tutorial: Corridor Spike Traps

Tutorial: Corridor Spike Traps

Spike traps are always fun, whether the players know they are there or not.

This particular type is used in corridors. I either lay it down as a visible challenge or swap out another corridor piece with this once the players spring the trap.


  1. Start by gluing floor tiles to your foam base. Do not glue the the middle floor tiles however. I still place them on the board when building to ensure the shape and size is correct. 
  2. Glue your walls in place. Remove the unglued floor pieces. 
    • In this example I make a 30" pit of spikes. 
  3. Clean up your base by cutting away the unnecessary foam. 
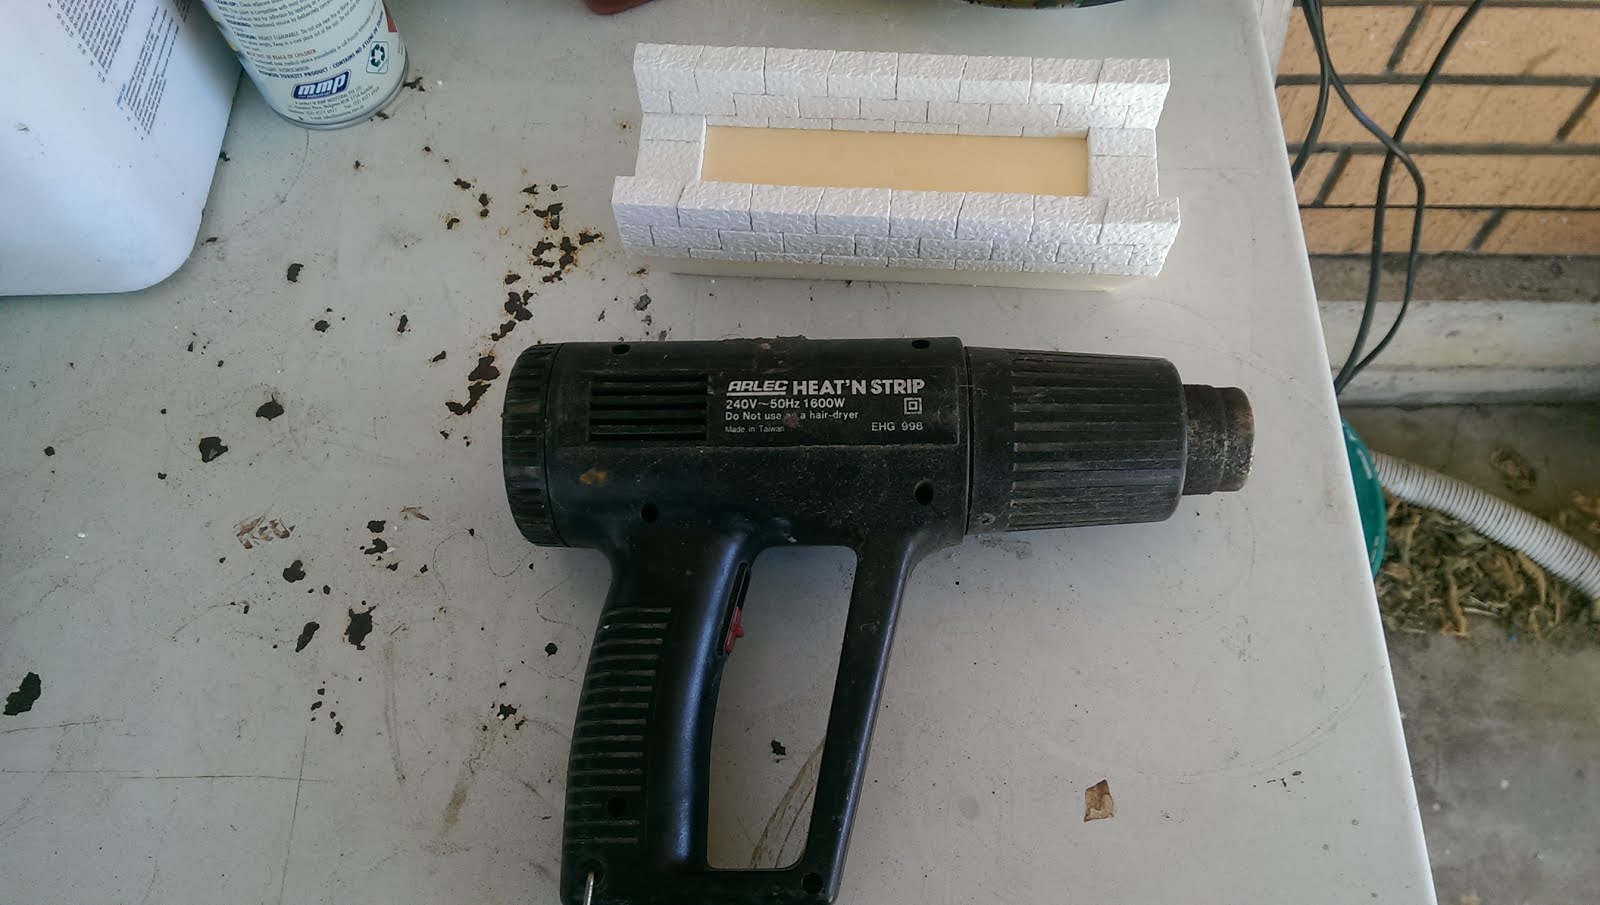
  4. USE CAUTION - Use a heat source to melt the foam base where the pit will be. I use a heat gun which is perfect. This lets me safely direct the heat where i need it. You could use a match etc but this is more dangerous. Make sure you do this outdoors to ensure ventilation as the fumes are toxic. Don't burn all the way through. Just deep enough to simulate the pit. 
    •  
  5. Using spiky tooth picks put a series of holes in the foam where the spits will go. 
  6. Snap tooth picks to size and place them in the holes. 
  7. Water down some craft glue and pour it around the spikes. This will dry and hold them securely in place. 
  8. Once dry you can proceed to paint your new trap!
    • \

TIP: Check out the rules of the system you are playing and ensure your pits are too far for a normal character to jump over. 

Monday 11 January 2016

Advice: Planning a Modular Dungeon

Before you embark on creating your own Hirst Arts modular dungeon you need to sit down and consider your plans and available resources. 

The first and one of the most important things you need to consider is what will you base your dungeon on. The instructions provided by Bruce recommend a number of products, i have listed these and more below. 

  • High density foam board. 
  • Cork Tiles
  • Medium-density fibreboard (MDF)
  • Strong Cardboard
Before you pick a product make sure you consider the following:
  • How readily available is the product ?
  • Is the product going to be available for the foreseeable future?
  • How easy is the product to work with?
  • How heavy is the product?
  • How detailed is the product?
  • Will you want to add pits, holes, traps, stairs below the level of your floor?
  • How easy is it to paint?
  • Will it warp?
After answering all of these questions the product i chose to work with was High Density Foam Board. 

Living in Australia i was able to source this from one of our most popular hardware stores, Bunnings. It come's in 1" and 2" thick variations. I went with the 1" as i felt the 2" was too think. 


You will also need glue to put everything together. I use Aquadhere Quick Set Adhesive. The fast bond time lets you work faster. 

From here I personally followed the instructions on the Hirst Arts website. This was a great place to start and left me with a starting dungeon large enough to run quite a variation of encounters. 


Of course once you have made your share of pieces with these instructions you will undoubtedly want to create more. This is where you need to sit down and consider your next actions. 

The hirst instructions work on corridors that are 3" wide. This lets you have corridors that are 2" wide by the time you put walls on either side. 

The official recommendation provided by HIrst Arts
At first i worried that this might be too thin for standard corridor fights. After a year of gaming however I can report that this works quite well. It lets two characters move past each other efficiently enough and restricts free movement within corridors which is how it should be. 

With this in mind i decided to expand on this layout using the plans below. The benefit of this design was that everything would become modular with the pieces i had already made using the Hirst Instructions. This also gave me much greater flexibility to make much larger rooms by combing as many of the large room sections together as necessary. 

Diagram of the modular pieces i have based my dungeon on.
I started out with making amazing walls per the official instructions. They were high and full of lovely details. My players also had to stand up to see what was happening. I therefore quickly changed my approach. I make walls primarily no more than 2 blocks high. I will add feature walls where appropriate but always aim to have only one feature wall in a room ensure better visibility from the other angles. 

By adding these modular plans to your layout you can make some incredible dungeon layouts. Below are some examples from our groups gaming sessions. 

Layout showing basic pieces per Hirst instructions with some of the large room pieces. 

Layout with both basic and advanced pieces per Hirst instructions with some of the large room pieces. 
I quickly realized that i needed more than a dungeon in my game and started to branch out into caverns and inns. I will discuss those in a future post however. 


Sunday 10 January 2016

Overview of Progress in 2015

2015 was such an incredible busy year. It's the year i started this project and hopefully the year of the greatest outlay in mold costs. 

The photo's below were taken on new year's eve to show all of the terrain i completed that year. It's something i wanted to do to give me an idea of what else i want to make. Unfortunately the answer was 'A LOT'.

I have received alot of feedback on the lack of painted models. Lets just say its easier to dry-brush terrain than it is to paint miniatures with a 2 year old sitting next to you. 

All pieces are based on 1" thick high density foam enabling some pieces to take on 3d features such as holes, pit traps, water bodies etc. 

The standard modular pieces are 5" x 5". I have tried to follow this standard for the majority of the project but there are some custom pieces that follow their own rules. 
Corridors are generally 3" wide with varied length's.
Majority of the plaster work is made with Hydrastone (10,000 psi). I played around with Dental Plaster but found that it chips quite easily. Hydrastone is quite heavy and has survived my 2 year old daughter getting to it with her barbies.
Molds used:

HIRST ARTS - http://www.hirstarts.com/
Gothic Dungeon Accessories Mold #41
Gothic Arena Accessories Mold #42
Gothic Panel Accessories Mold #43
Gothic Additional Accessories Mold #44
Gothic Dungeon Builder #45
Inn Building Accessories Mold #57
Common Inn Accessories Mold #58
Unique Inn Accessories Mold #59
Fieldstone Wall Mold #70
Fieldstone Accessories Mold #71
Rock Cavern Root Mold #83
Rock Cavern Pillar Mold #84
Cavern Accessory Mold #85
Egyptian Tower Mold #93
Floor Tiles Various Sizes Mold #201
Wooden Plank Mold #220
Inn Floor Mold #221
Wood Shingle Roof Mold #240
Cavern Floor Mold #281
Cavern Floor Accessories #282

4BOT INDUSTRIES - http://www.4botindustries.com/
G06 - Lava / Worn Ground Terrain
G05 - Lava / Worn Ground Terrain


LADY SABELLE DESIGNS - http://ladysabelledesigns.com/
Mold #1 – Cloth Mold
Mold #2 – Floor Accessory Mold
Mold #3 – Rags and Riches

Australian Supplier of Hydra-Stone and other awesome products